Creating uncoded cels


This section discusses creating uncoded cels in several ways:

How to convert 16-bit source art to a 16-bit uncoded cel

To convert 16-bit source art to a simple 16-bit uncoded cel, follow these steps:

  1. Load the source art into Photoshop.

  2. From the File menu, choose Export > 3DO CelWriter, then choose Save in the dialog. An extension .cel or .CEL is recommended.

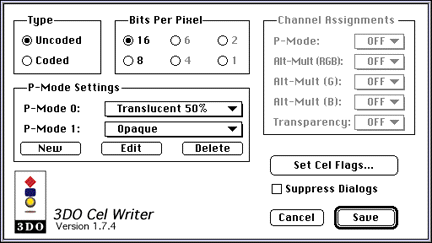
    The CelWriter dialog appears.
    Graphic cannot be 
displayed

    Figure 1: 3DO CelWriter dialog.

  3. In the dialog, select Uncoded in the Type box.

  4. Select the number of bits per pixel.

    If you started with 24-bit source art and choose 16 bits per pixel, the tool discards the bottom three bits in the red, green, and blue channels while it saves the cel. This may result in a color distortion of the cel.
  5. Choose Save to export the cel.

How to convert 24-bit source art to an 8-bit uncoded cel

If the source art image used is 24 or 16 bits per pixel and you want to save an 8-bit uncoded cel, you need to index the colors into a different color table before you start the export process, since you can't save all the bits in the cel.

  1. From the Mode menu in Photoshop, choose Indexed Color.

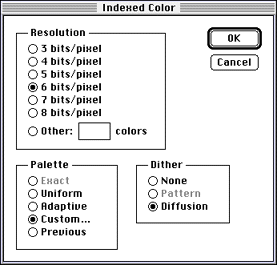
  2. In the dialog that appears, choose a resolution of 8 bits per pixel, and a custom palette. In many situations, it also helps to choose a diffusion dither.

    Graphic cannot be 
displayed

    Figure 2: Photoshop color conversion dialog.

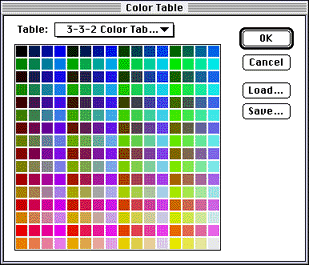
  3. When you click OK, a Color Table dialog appears.

  4. Choose Load and use the file selection dialog to specify one of the 3DO-supplied color tables, 3-3-2 Color Table (REP8 clear) or 3-3-2 Color Table (REP8 set).

    Graphic cannot be 
displayed

    Figure 3: Photoshop color table dialog.

  5. After the color table has been loaded, choose OK to apply it to the source art.

  6. From the Mode menu, choose RGB color, since the CelWriter cannot save files in indexed color.

  7. From the File menu, choose Export > 3DO CelWriter, then choose Save in the file selection dialog. An extension .cel or .CEL is recommended.

  8. In the dialog, select Uncoded in the Type box.

  9. Select the number of bits per pixel.

  10. If you started with 24-bit source art and choose 16 bits per pixel, the tool discards the bottom three bits in the red, green, and blue channels while it saves the cel. This may result in a color distortion of the cel.

  11. In the CelWriter dialog, click Set Cel Flags and make sure the color table matches the Control Settings:


  12. Choose Save to export the cel.

Note: If you need more control over the color table, use the 3DO Animator tool instead.